Setting Up SQL Server Failover Cluster Instance (SQL FCI)
SQL Server Failover Cluster Instance (FCI)
On this guide, I will show you how to setup a SQL Server Failover Cluster Instance or mostly called SQL Server FCI. It is a bit different than SQL Server AlwaysOn Availability Group where we can have primary node (owner node) and secondary node but the SQL Server itself is actually treated as a single Instance using Shared Cluster Disk.
Notes: This guide will use VMWare on my local computer for testing purpose only
The requirements for setting up SQL Server Failover Cluster Instance are these:
- Primary node and Secondary node for hosting SQL FCI joined to Active Directory
- Windows Server Failover Cluster (WSFC) configured for all nodes
- Shared Cluster disk for the Cluster which will be used for SQL FCI
- Network Name for the SQL Server name in Active Directory
- An IP Address for SQL FCI
For configuring and installing SQL Primary node and Secondary Node, also with configuring and installing WSFC you can follow the guide which I previously made at here: WSFC Guide
The guide was for setting up SQL Server AlwaysOn Availability Group but you can follow the instructions to setup WSFC.
Configure Shared Cluster Disk using iSCSI in VMWare
So in this part we need to have a shared cluster disk for each node to be able to install SQL FCI. I will be using my setup as previously installed from This Guide where I have three servers:
- DC01 as my Domain Controller
- SQL01 as my SQL Server Primary Node
- SQL02 as my SQL Server Secondary Node
So I will use my DC01 to host an iSCSI disk which will be targeted to SQL01 and SQL02 as a shared disk. (ideally you should have different server for this, but to save up my resources i host it in DC Server)
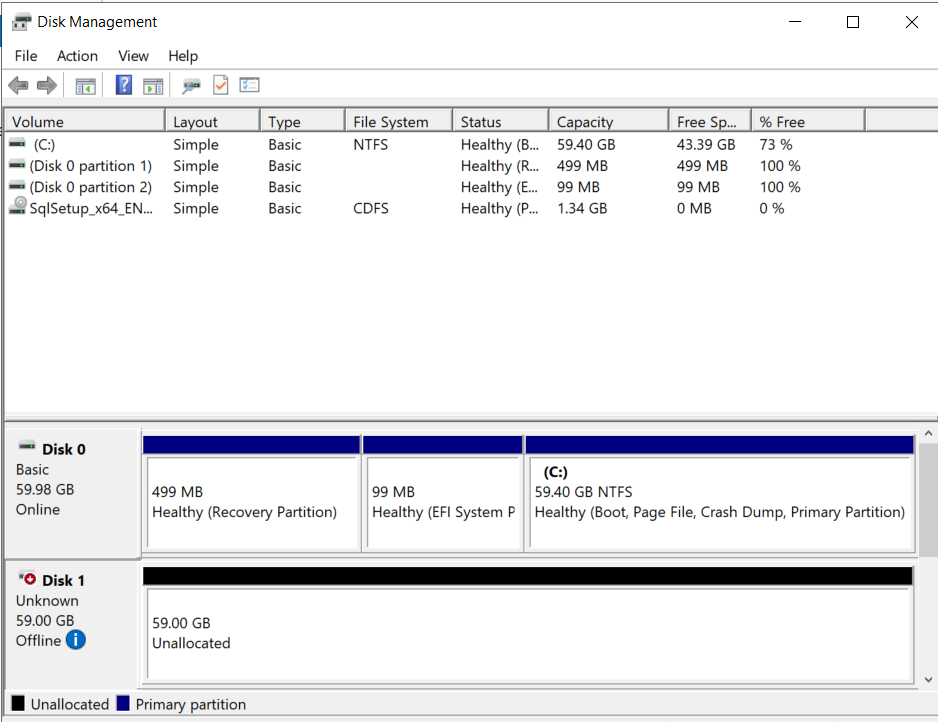
1. On VMWare, setup a new disk for DC01 and inside Disk Management setup the disk until it's online and useable as shown above
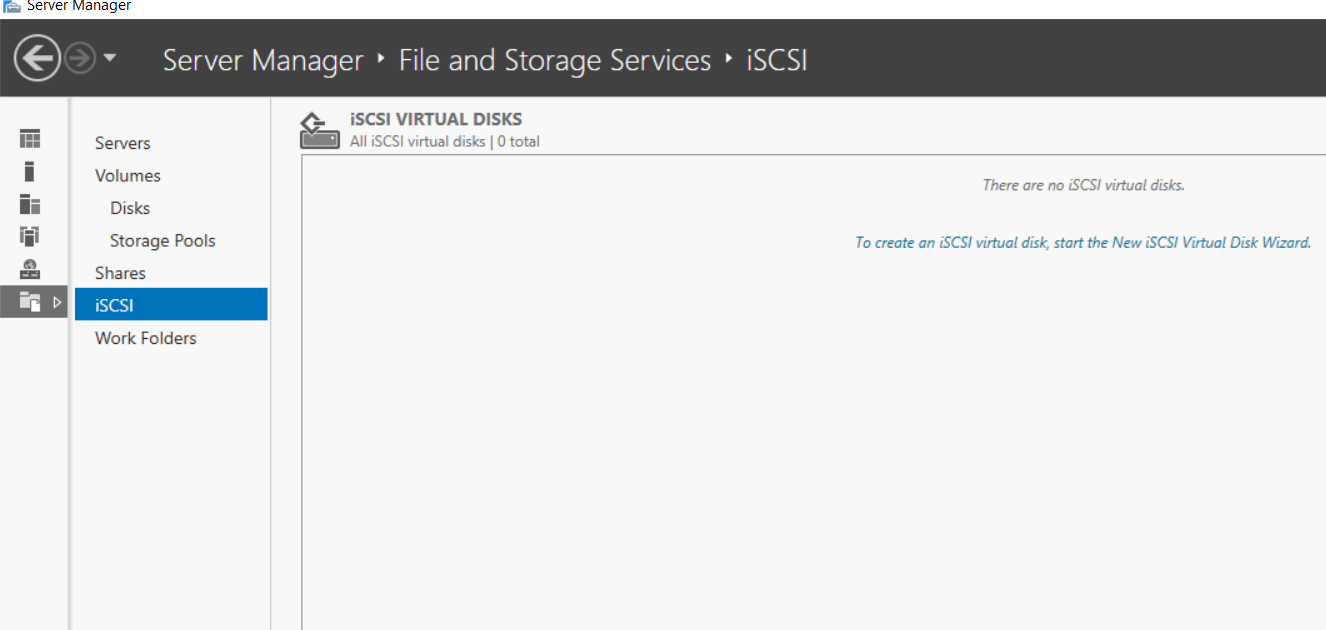
3. Now Navigate to Server Manager > iSCSI and we are going to create a virtual disk, Click on the wizard to create new iSCSI Virtual Disk
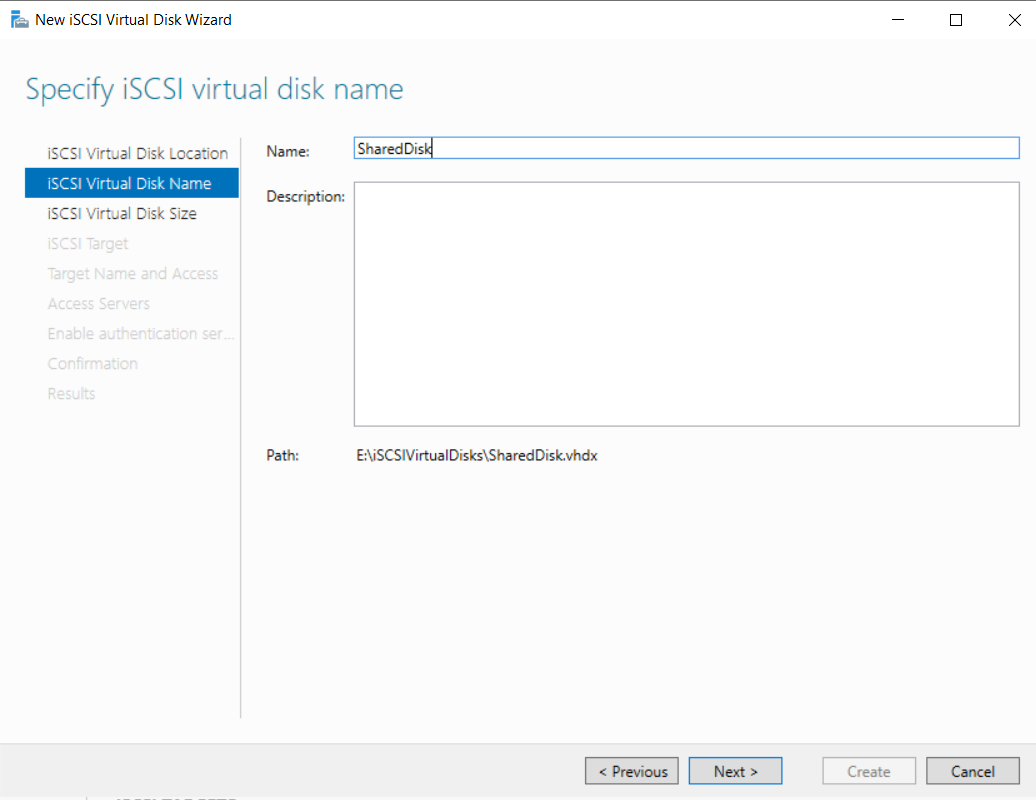
4. Now a pop up window shows and select the DC01 server, also select the Disk which will be used (in this case, drive E:) and Next
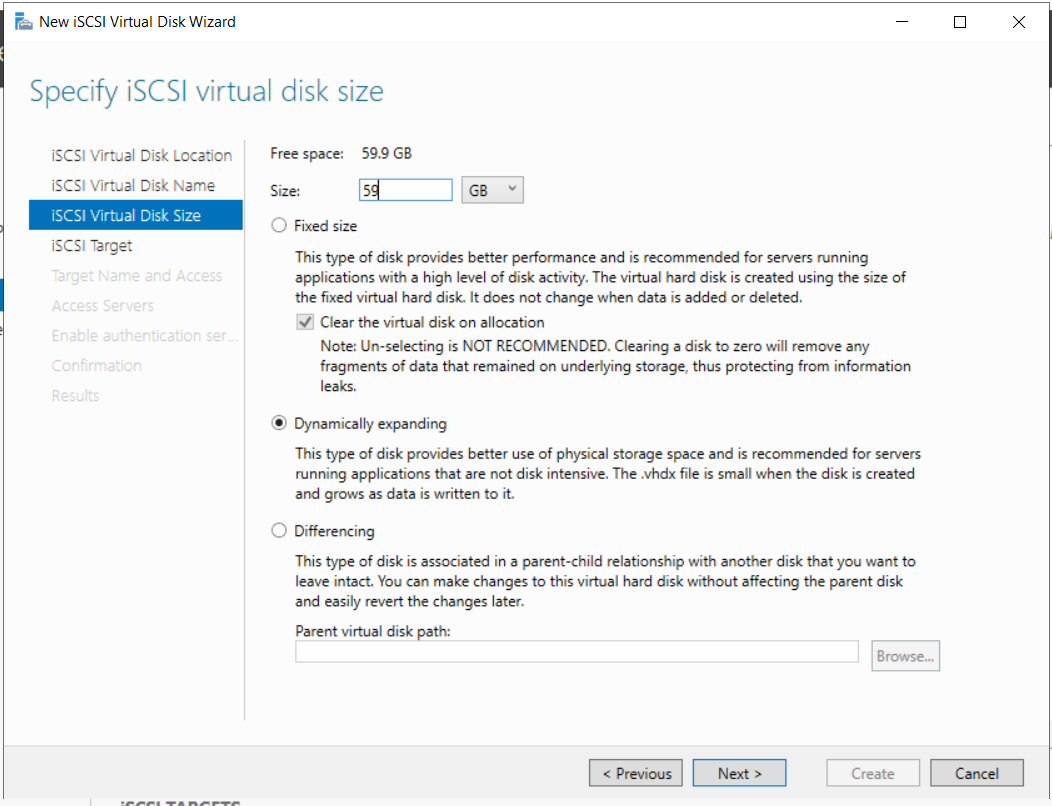
6. You can choose either to give fixed size for the disk or dynamically expanding (it will start with small size and expand to the specified size), then click Next
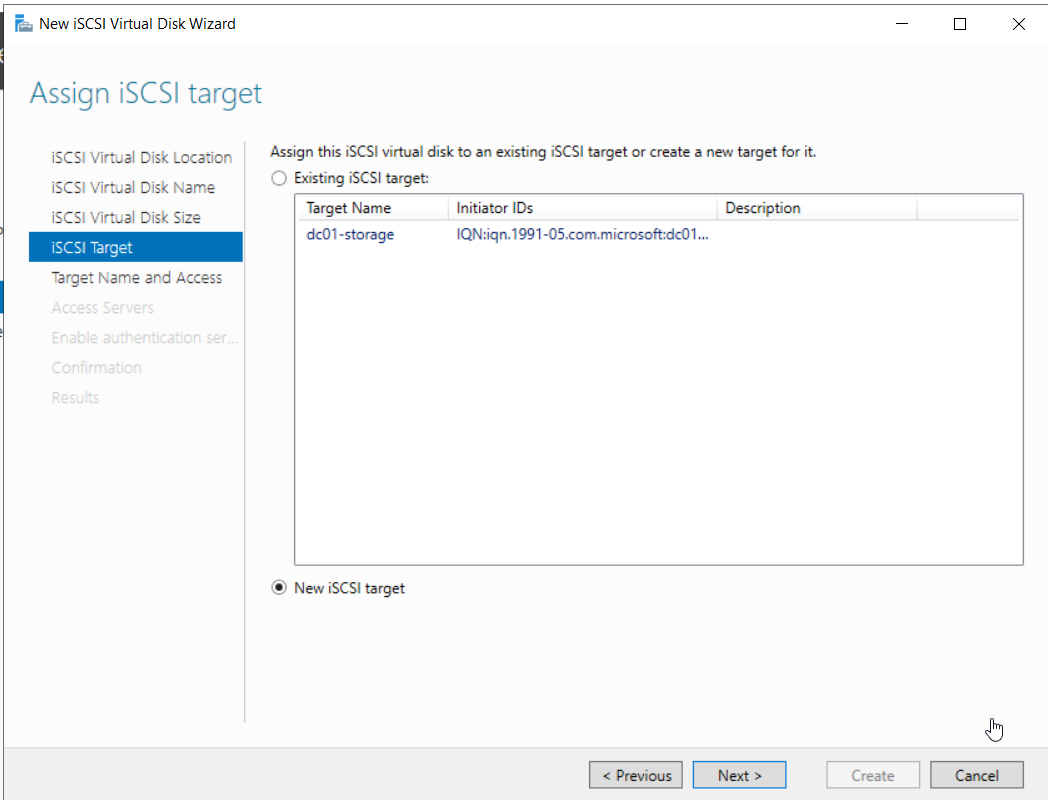
7. Choose New iSCSI target and click Next
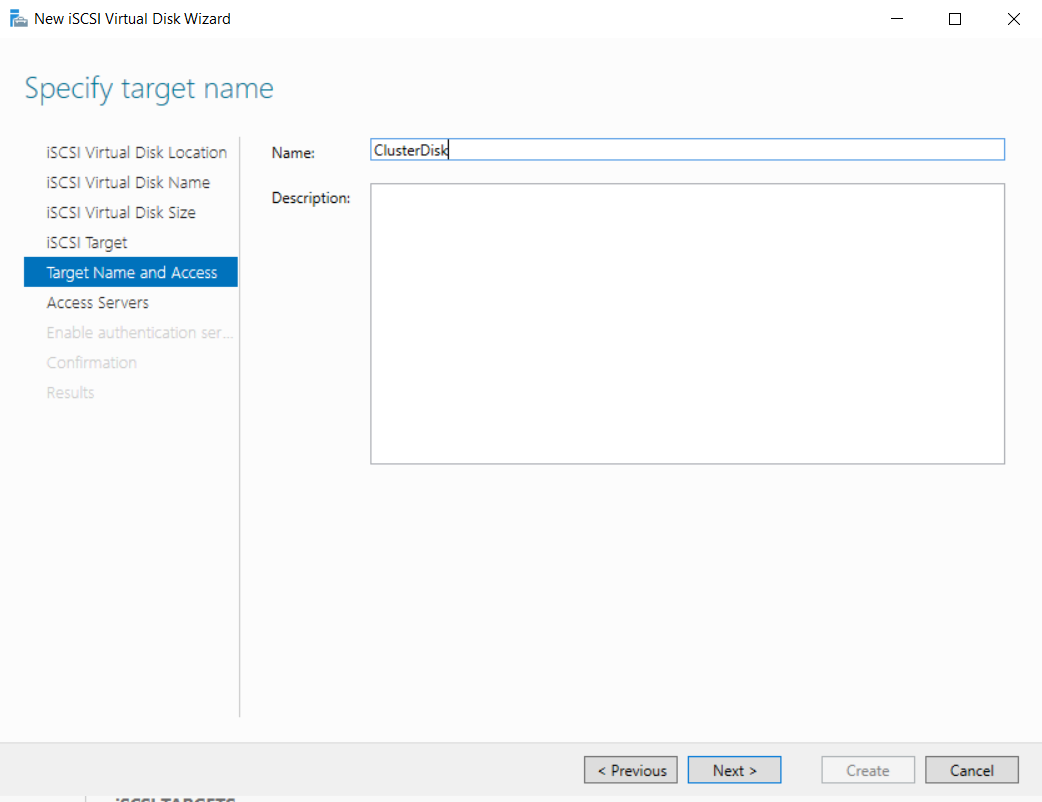
8. Give the new iSCSI target a name and click Next
9. Choose Add, and then enter the IP Address of the SQL01 and SQL02, then click Next
8. Give the new iSCSI target a name and click Next
9. Choose Add, and then enter the IP Address of the SQL01 and SQL02, then click Next
13. Now login to SQL01 and open Server Manager, and choose iSCSI Initiator in the Server Manager Tools
14. In the Quick Connect target, enter the DC01 IP Address, which is 10.0.0.11 in this case, and click Quick Connect. After that select the IQN which we made before, in this case the clusterdisk-target IQN (because i named it clusterdisk) and then click Connect. It will show status of Connected for that IQN.
Now do the exact same steps for SQL02 too.
15. Now open up Disk Management in the SQL01 and you will find Unallocated Disk, Bring the Disk Online and also Initialize the Disk. After that create a simple Volume Drive for the disk, in here I use G: as the drive letter. You will be able to access the Disk via Explorer.
Do the same exact steps for SQL02 as well. (make sure to change the drive letter to the same one)
16. Now navigate to Windows Failover Cluster and then navigate to Disks pane, and Click Add Disk. Choose the disk that you just created on the step before and click OK. Finally the Shared Cluster Disk between SQL01 and SQL02 has been created.
Installing SQL Server Failover Cluster Instance on SQL01 (Primary) and SQL02 (Secondary)
Now this is a bit tricky, first thing, you need to mount the SQL Server iso to install (you can refer to here to follow how to download Developer Edition: Download ISO). But don't execute the setup.exe first because the default installer will check for the cluster validation which is often case will fail and you cannot install SQL FCI. For this, we just have to skip the Cluster Validation checking by running through Command Prompt.
This also can be read on Microsoft Documentation for reference: Microsoft Reference
17. Open Command Prompt with run as administrator, and then navigate to the drive on which SQL Server iso is mounted (in this case O:) and then run this command:
Setup /SkipRules=Cluster_VerifyForErrors /Action=InstallFailoverCluster
18. Next, SQL Server installation process will be shown up, for best practices installation guides you can refer to this guide: SQL Server Installation Guide
For this setup, you should set the SQL FCI Network Name (this is the name that will be registered as Computer Object in Active Directory) and Instance Name is the SQL Server Name like the in a stand alone installation
You also need to choose the Cluster Disk that will be used to host SQL FCI, and also give IP Address for the SQL FCI in the AD/domain
The SQL Server Service and SQL Agent also need to be hosted by using a service account in the active directory
After all has been set up, just install and wait until all processes finish
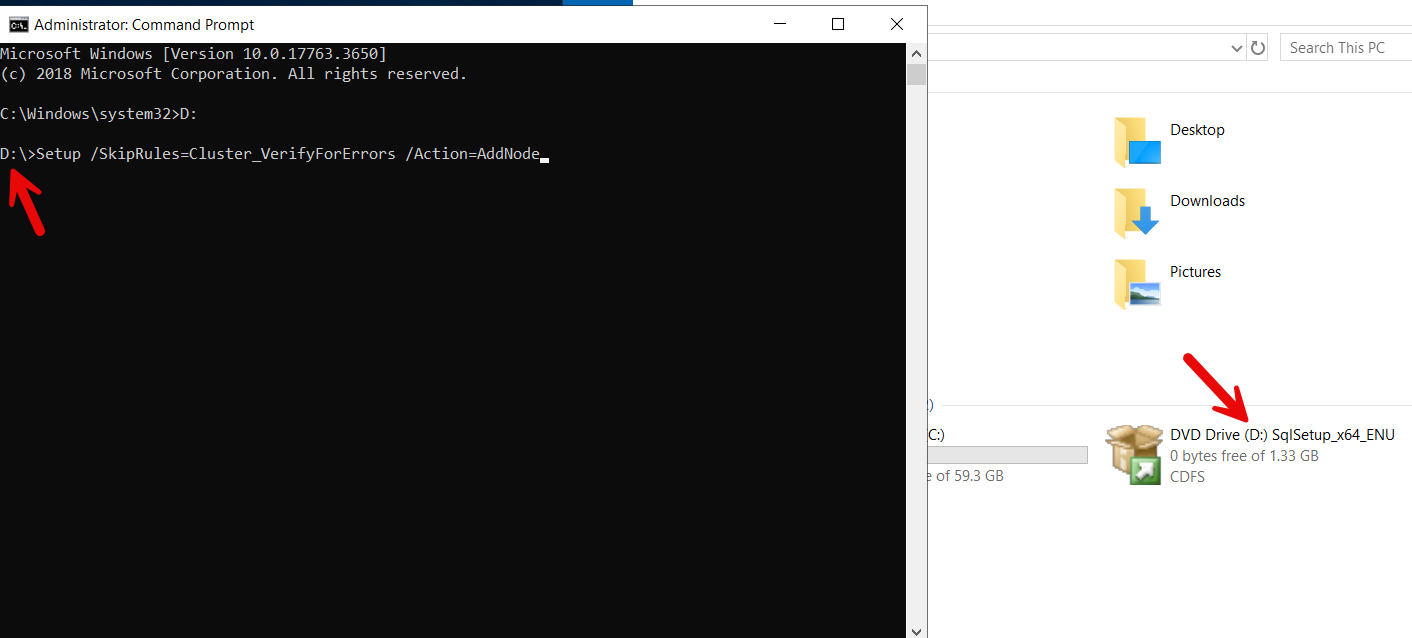
19. Now, after finished installing in SQL01, login to SQL02 and then mount the SQL Server iso to SQL02. Open Command Prompt with run as administrator and then change the directory to the drive on which SQL Server iso is mounted (in this case drive D:) and then run this command to add node to the SQL FCI that had been installed on SQL01 before:
Setup /SkipRules=Cluster_VerifyForErrors /Action=AddNode
20. SQL Server installation window will pop up, but for this installation wizard you don't need to configure anything at all, you just need to select which SQL FCI that you want to add this SQL02 as a secondary node to. Also, you need to reinput the password for the service account which is used for hosting the SQL Server Service. Just Click install and then wait until all the processes finish.
21. You have successfully installed SQL Server Failover Cluster Instance, you can check from the WSFC Roles, there will be your SQL FCI. To login to the SQL FCI you can connect to <FCI Network Name>\<FCI Instance Name> (in this case: FCI\FCISQL) or you can use IP Address too if you enable the TCP/IP Protocol.









Comments
Post a Comment